No longer confined to your granny’s old-fashioned cottage, dried and pressed flowers are firmly back in vogue.
From pampas grass to posies, we’ve noticed them popping up in every envy-inducing scroll through those oh-so-Instagrammable homes.
When done properly, preserved flowers can last for at least a year – and often many more. Sure, you can buy them from the shops, but pressing and drying your own is much more personal.
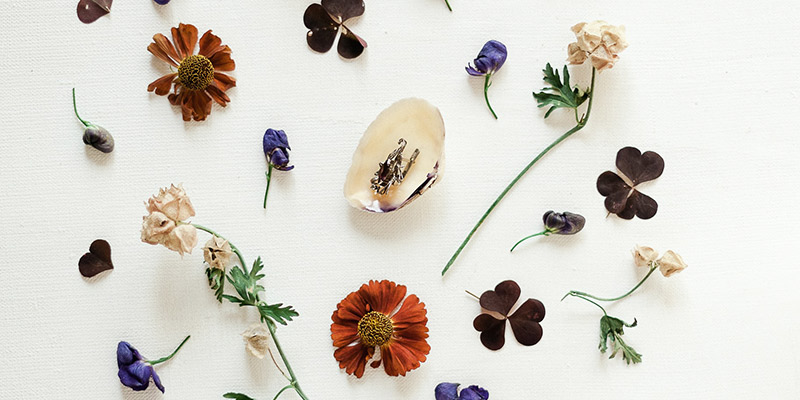
Fun and relaxing after a long day in the office, it’s also a remarkably easy and affordable hobby to take up, especially if you already grow your own flowers or enjoy foraging in the countryside. Your results can be used for everything from confetti and flower crowns to bridal bouquets, gift wrapping and pot pourri.
The best method largely depends on the type of flower you want to dry or press and how patient you’re willing to be, so to help you choose, we’ve run through the pros and cons of them all below.
Before we start, here are a few top tips to bear in mind:
- Spring and summer bring many beautiful blooms for picking (or buying from our seasonal range, if you’re a gardenless city dweller). Cut them before they’ve fully bloomed, as they’ll open more as they dry, and always in the morning once the dew has lifted, when they’re looking their freshest.
- Flowers with high moisture content, such as lilies, won’t dry well, so stick to enjoying them at their best.
- For the boldest and most beautiful results, choose yellow or orange flowers to dry. Purple and blue flowers can also give dramatic, but darker, results.
How to dry flowers
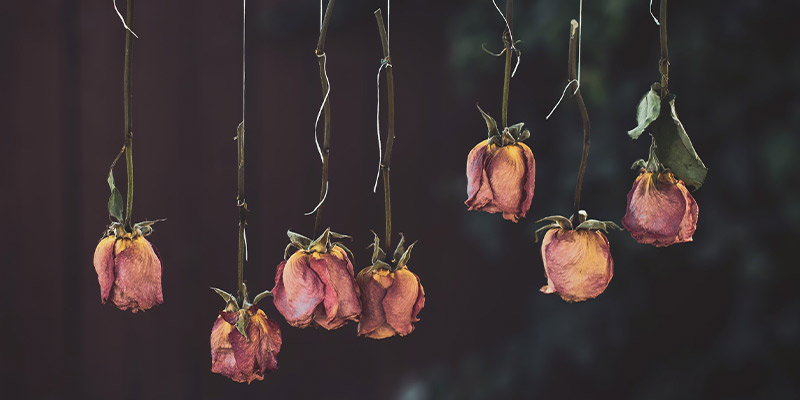
Air drying
This is the traditional way, and the slowest, most mindful approach. It involves tying your chosen stems together at the base, removing their leaves and hanging them upside down in a cool, dark, dry place (an attic or unused cupboard works well) for two to four weeks.
The upside down part is key if you want your bunches to retain their structure without drooping, as is the dark bit for keeping their vibrant colour.
Once the petals feel rustly to the touch, carefully take them down and spritz them with hairspray to help them keep their shape. Store or display them somewhere where they won’t get damaged, as dry flowers are brittle and fragile.
Pros: Easy, photogenic (perfect for a #interiorsinspo post), prevents drooping
Cons: Slow (but this could also be a pro!), requires hanging space
Best for: Sturdy flowers with a low water content. Try roses, lavender, hydrangea, carnations, chrysanthemums, sunflowers, cornflower, peonies (when hung individually), daisies, eryngium, nigella, larkspur, gypsophila and foliage
Silica gel
Though fiddly, this method is a good choice when drying flowers with more papery petals, such as poppies, as it helps them to dry without shrivelling. It’s a wise choice for bouquets, too, as the stems will dry straight.
Half fill an airtight container with a fine, moisture-absorbing silica gel (cat litter also works!) before laying your stems on top with their heads facing down if possible.
Gently bury the flowers in more silica gel, replace the lid, then leave them for three to five days out of direct sunlight.
Remove them carefully and dust off any clingy beads using an old makeup brush. Read on for how to speed this process up…
Pros: Fast, gentle for delicate flowers, preserves colour
Cons: Fiddly
Best for: Bouquets or flowers with bigger or more delicate heads. Try poppies, peonies, tulips, carnations, roses, irises, chrysanthemums, daisies, asters, sunflowers, pansies, lilac, eryngium, gypsophila and lavender
Microwave
If speed is of the essence, perhaps because you want hand-made confetti or decorations for a wedding or other event, then make the microwave your new best friend. Dried flowers in minutes? Yes please!
Repeat the first steps above, only use a microwaveable dish and keep to one species at a time as they dry at different rates.
Once your stems are covered with silica gel (or that excellent, glamourous substitute, cat litter), pop them into the microwave along with a cup full of water to save them from burning, setting the timer for 10 seconds a time before you’re happy with their dryness.
Silica gel gets hot, so leave the dish to cool all day before lifting out the stems and brushing away any stray beads.
Pros: Fast
Cons: Risk of burning, colour may fade more
Best for: Flowers with hardy dense or open-faced petals. Try carnations, daffodils, peonies, roses, hydrangeas, sunflowers, irises, tulips, chrysanthemums and sunflowers
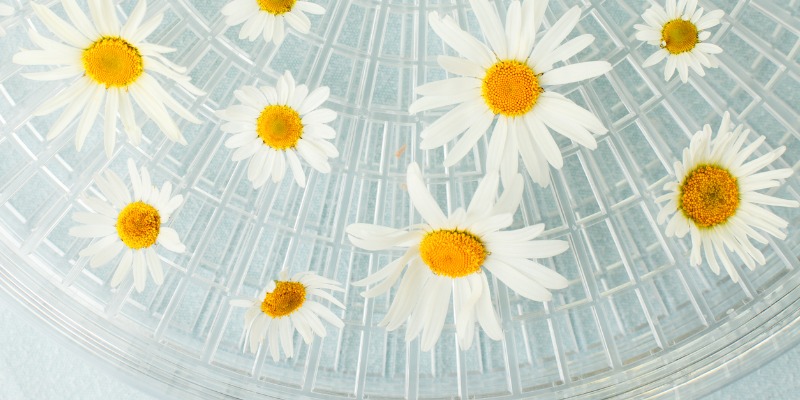
Food dehydrator
Using a dehyhdrator lets you dry a batch of clipped flower heads at once – even more so than can fit into a standard oven. The process will take longer – up to 10 hours, or overnight for blousier heads and buds – but still be quicker than air drying.
For best results, dry one type or size of flower at a time at 100F, leaving enough space between stems for air to flow freely. Place those with denser petals closer to the fan, as these will take the longer to dry.
Pros: Fast, easy
Cons: requires a food dehyradtor, some flowers can leave a scent behind so wash trays thoroughly before using them for cooking
Best for: Most flowers that can fit in your dehydrator. Try carnations, roses, daisies, marigolds, zinnias and cornflowers
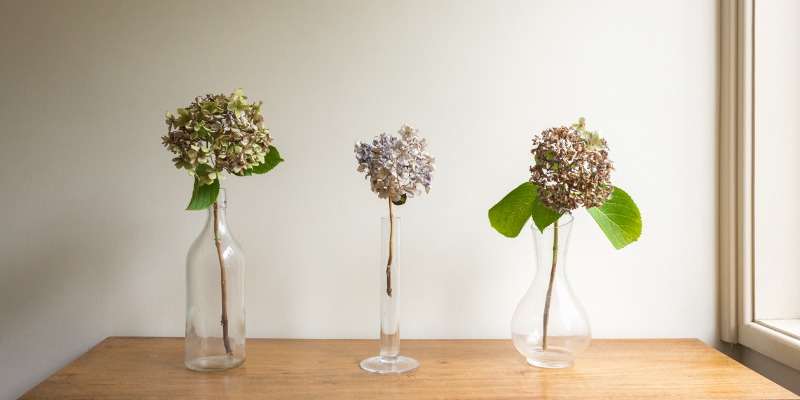
Vase drying
If this extremely simple method always worked a treat, everybody would do it, but results can be patchy.
It’s a great route to go down if you want to enjoy your bouquet to its fullest before it starts to fade, but there’s a risk of mould if the stems are tightly packed into the vase. Drooping is also a common problem, but regularly trimming the ends and changing the water can help stave this off.
Pros: Easy, doesn’t take up much space, can enjoy your flowers first
Cons: Mould and drooping can occur
Best for: Bouquets, especially those with darker flowers, bigger blooms like hydrangeas
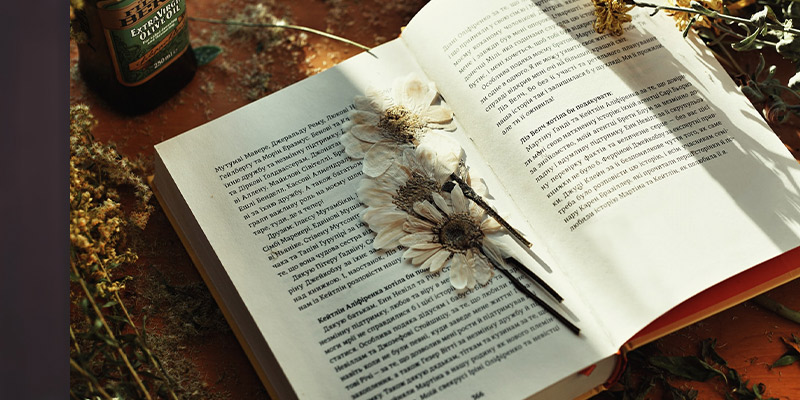
How to press flowers
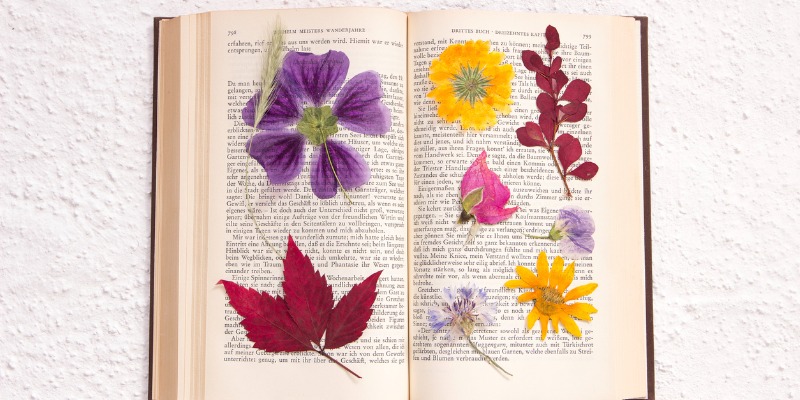
Books
Unlike drying, pressing involves squeezing the moisture out of flowers. It stands to reason, then, that you’ll need something heavy. Time to shine, big books that never get read!
Choose flowers with thick, robust petals and sandwich them between two pieces of parchment paper. Either lay these flat on a table and place your chunkiest tome on top, or line its pages with parchment paper, pop your flowers inside and close it.
Leave the book in a warm, dark, dry place and check in on your blooms a week later. Replace the parchment paper, being careful not to tear your delicate flowers, and repeat until they’re fully dried, which usually takes about a month.
If you need to add more pressure to your pages, wrap an old best around your book to keep it tightly closed.
Pros: Easy, cheap, good for creating flat flowers for craft projects
Cons: Flowers can loose some vibrancy
Best for: Small, single flower heads that can lay flat as they’ll hold their colour better, such as forget-me-nots, pansies, cosmos, daisies and poppies
Flower press
This works like the book method above and takes the same amount of time, but isn’t quite as makeshift (and much handier if you don’t have a heavy novel going spare!).
Flower presses are essentially two pieces of wood bolted together in each corner, with stacked pieces of cardboard and parchment paper sandwiched in between. They’re affordable to buy and easy to make yourself with a few basic DIY tools and skills.
For faster results, buy a microwaveable flower press; they’re like the normal ones but without any metal and with vents to let steam escape so that your flowers dry more quickly. Or, sandwich your flowers between two pieces of parchment paper, put a microwaveable plate on top and heat it on low for thirty seconds, or until the blooms are dry.
Pros: Creative, good for creating flat flowers for craft projects
Cons: Involves making or buying a flower press, flowers can loose some vibrancy
Best for: As above
Iron
If speed is the name of your flower pressing game, grab your iron (while it’s off, we hasten to add). Place your blooms between two pieces of parchment paper, paper towel or cotton rags, and flatten them using – you guessed it – a heavy book.
Make sure there’s no water in your iron, as we’re trying to banish moisture here, not introduce it! Preheat it to a low temperature, remove the book and lay the paper on top of an ironing board.
Press with the iron, without moving it, for 15 seconds or so. Don’t be alarmed if you hear some sizzling; this is the moisture escaping. Remove the iron, let the paper cool, and repeat the process until you’re happy with the results.
Pros: Easy, fast
Cons: Risk of burning the flowers (and yourself!)
Best for: As above
You’ll find a range of flowers that are perfect for drying or pressing within our extensive range, starting from just £19.99. Choose from roses, carnations, hydrangeas and more, then get florally creative!